For using the attendance function with the bio-metric devices, a user must install devices and connect them to the Internet first; then, the user needs to set the corresponding parameters in the system so as to manage connected devices from the system, thereby implementing digital management, including uploading user attendance data, downloading the configuration information, and exporting various reports.
Set communications parameters for connecting to devices. The communication with the devices is successful only after parameters on the system and the devices are set correctly. After the communication is successful, you can view the information on the connected devices and perform operations on them such as remote monitoring, uploading, and downloading.
After a T&A device is connected to the system, if Real-Time Data Upload is checked in the device setting, all attendance records will be automatically uploaded to the system. Otherwise it is necessary to select a T&A device and click Synchronize All Data to synchronize information of all personnel who belong to the same area as the device to the device.
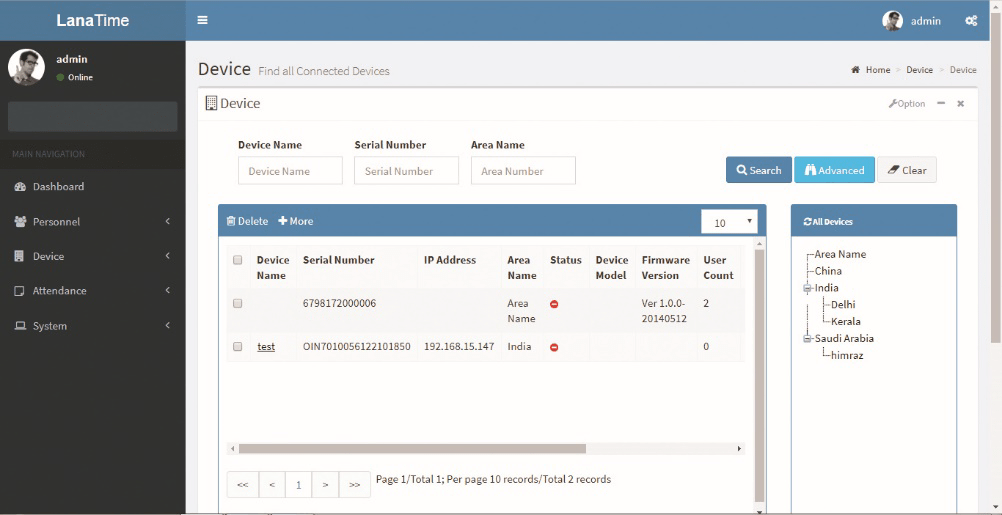
Choose Device >> Device to access the T&A device management main interface. All connected T&A devices are displayed in device interface.
ADD DEVICE
There are two ways to add a T&A device: manually adding a T&A device and automatically adding a T&A device.
Manually adding a T&A device
1. Choose Device >> Device >> Option >> Add to access the device addition interface.
There are two ways to add a T&A device: manually adding a T&A device and automatically adding a T&A device.
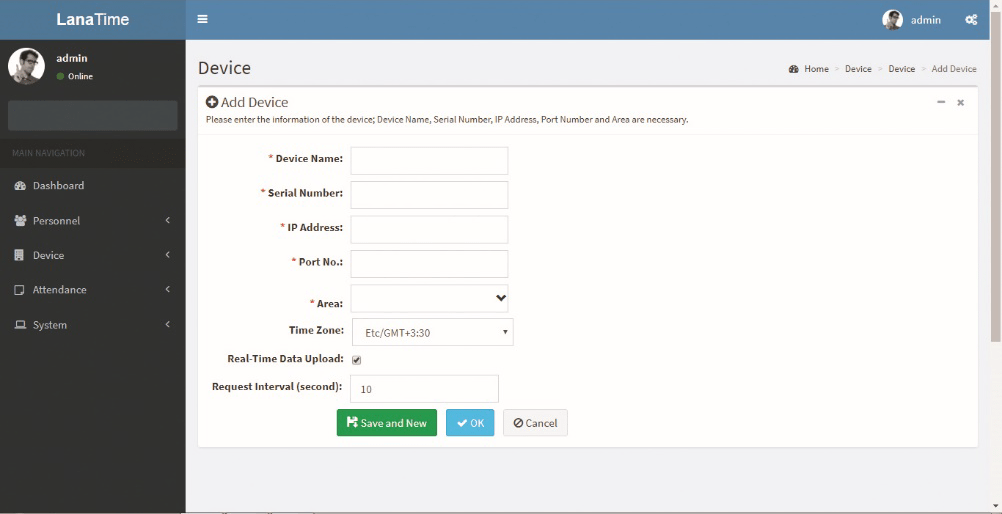
Set the parameters as required based on the following steps:
Device Name: Enter any characters, with 20 characters at most.
Serial Number: Enter the serial number of the device.
IP Address: Enter the IP address of the device.
Port No: Enter the port No. of the device, with the default value of 4370 in the Ethernet communication mode.
Area: In the drop-down list, select the area to which the T&A device belongs.
Time Zone: When a time zone is selected, the time on the T&A device will be automatically synchronized to the standard time in this time zone.
Real-Time Data Upload: Select whether to upload data in a real time.
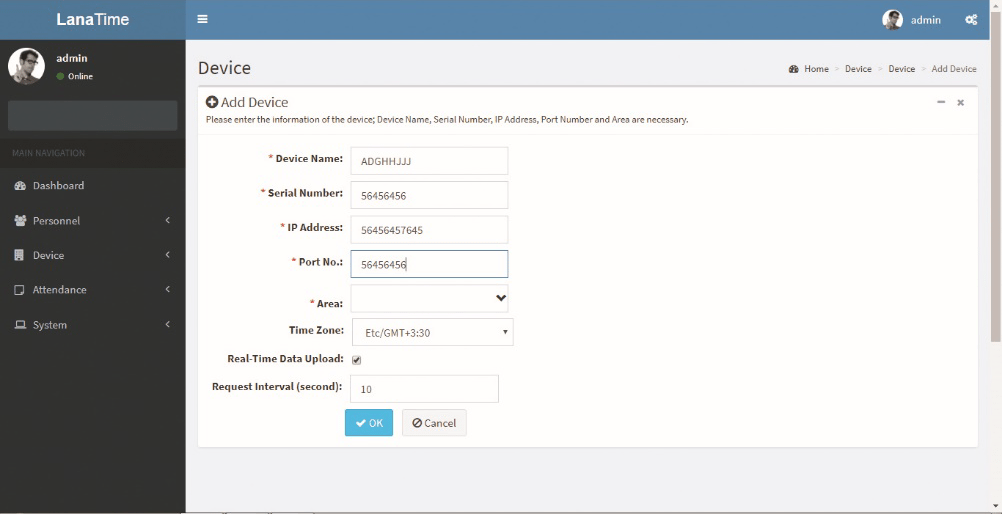
After the setting is completed, click OK to add the device and return to the Device interface. The device list displays the T&A device.
Note: If an employee is added to a device, when the employee information is uploaded to the server, the information will be automatically synchronized to other devices in the same area as the employee on the server.
Request Interval second: The time taken to receive request from device to server.
After the setting is completed, click OK to add the device and return to the Device interface. The device interface displays the T&A device in below list.

EDITING A DEVICE
Click a device name, or click Edit under Related Operation in the line of the device to be edited to access the device editing interface.
After the setting is completed, click OK to add the device and return to the Device interface. The device interface displays the T&A device in below list.
Note: Grey items cannot be edited. The device name cannot be the same as the name of another device.
DELETING A DEVICE
Detailed operations are described as follows:
1. Click to select the device to be deleted, and then click Delete above the device list, or directly click Delete under Related operation in the line of the device to be deleted to access the device deletion confirmation interface, as shown in the following figure.

2. Click OK to delete the device selected and return to the Device interface. The device list no longer displays the device deleted.
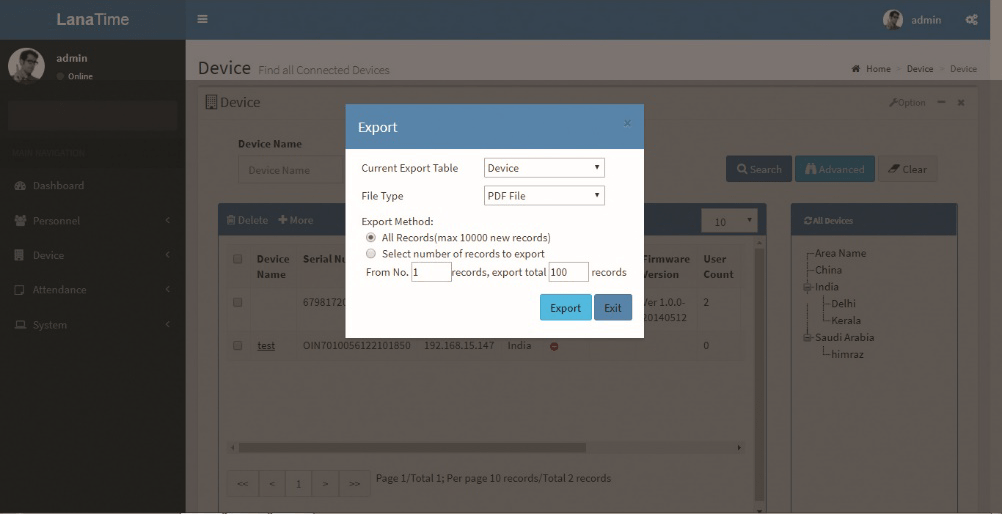
EXPORT DEVICE
Select the File Type from the drop down and Export method, then click Export button
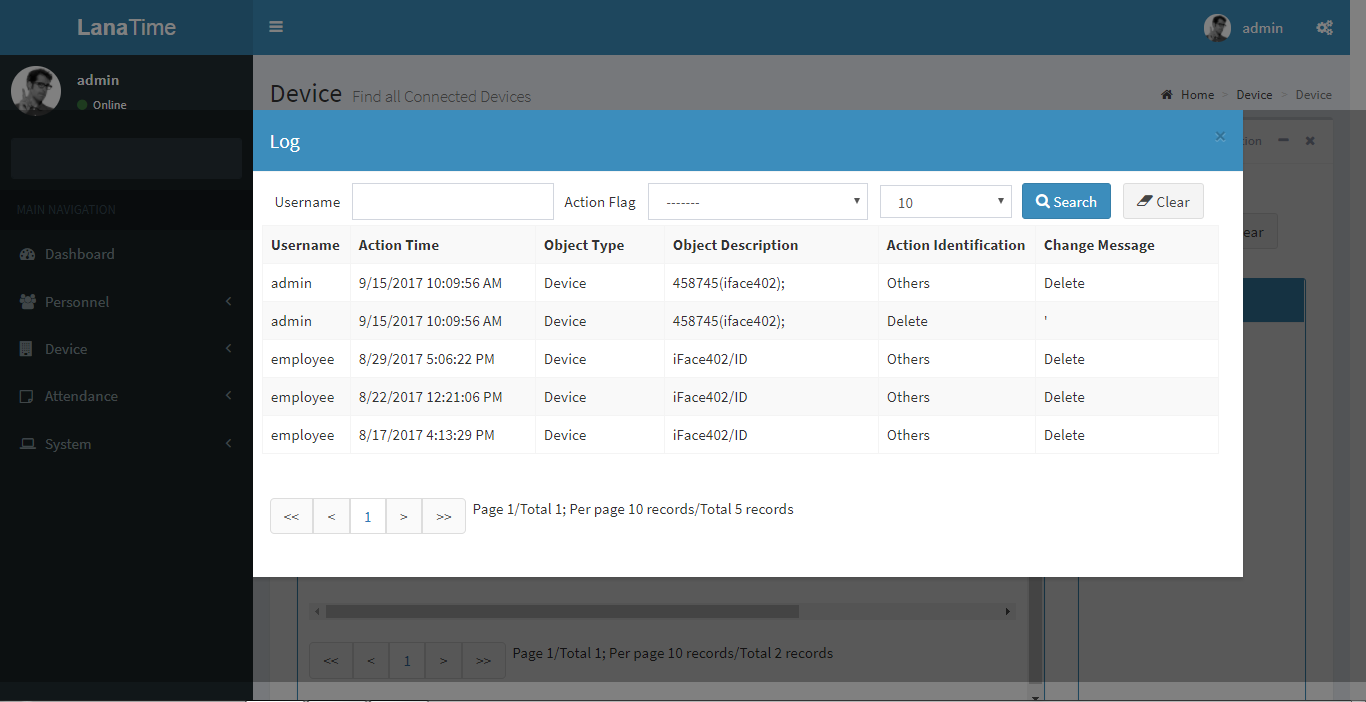
Log: The Log interface displays only the operation logs of the current operation module.
ADVANCED SEARCH
Advanced search is used for querying the efficiently by entering corresponding content in the fields according to the prompts. It helps to narrow the searches by a series of different conditions, ranges and fields.
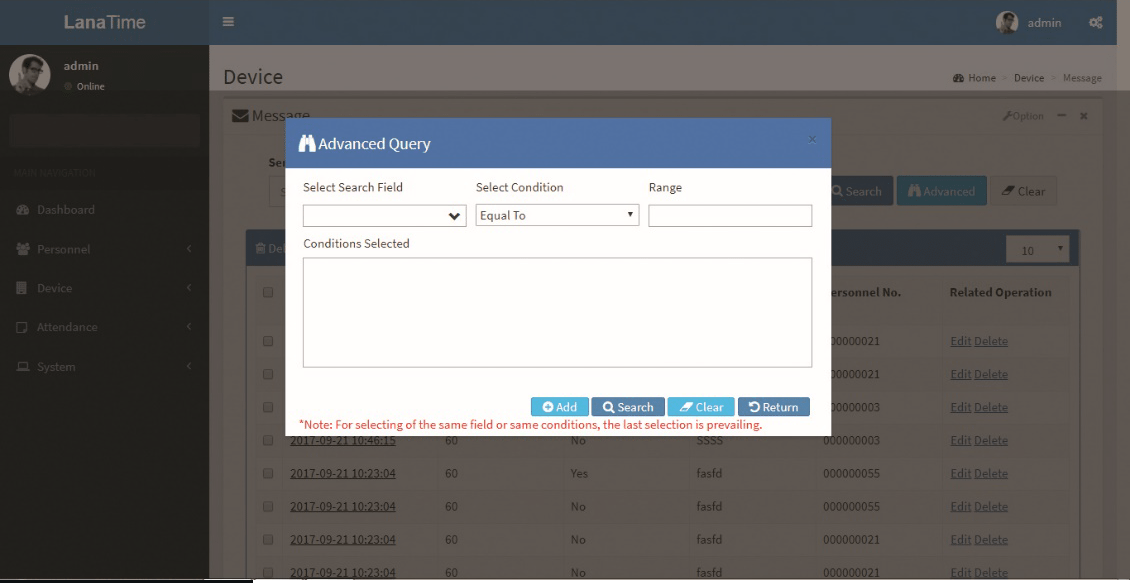
Set the parameters as required based on the following steps:
search field: Select field from the drop down that need to be searched.
Select condition: Select the condition from the drop down to search.
Range: It is used to set range or key word to search.
Add: The search conditions are displayed in the list beneath Conditions Selected, and multiple search conditions can be selected. The same field and the same condition can be selected only once.
Search: Searching displays the result according to the conditions.
Clear: This button is used to clear the conditions.
Return: Button is used to return from the current form.